
วันพุธที่ 5 กุมภาพันธ์ พ.ศ. 2557
PIR sensor กับ Arduino
คำค้นใน google : arduino with pir sensor หรือ arduino pir motion sensor พิมพ์ลงไปประมาณนี้ เดี๋ยว google มันจะแนะนำขึ้นมาเอง
คำค้นใน google : arduino with pir sensor หรือ arduino pir motion sensor พิมพ์ลงไปประมาณนี้ เดี๋ยว google มันจะแนะนำขึ้นมาเอง
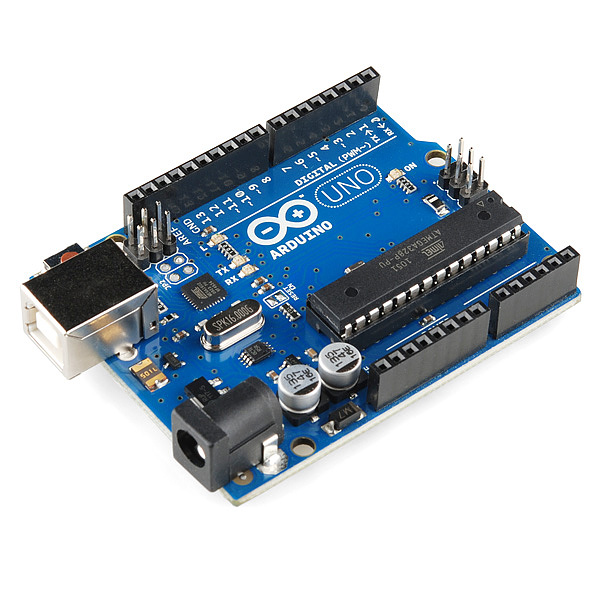 |
| Arduino UNO R3 |
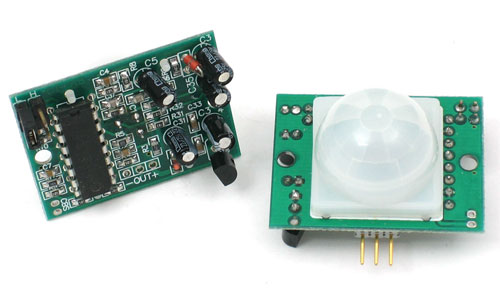 |
| PIR sensor for Arduino |
 |
| ลักษณะของขั้วต่อ และการปรับความไวในการตรวจจับของตัว PIR ซึ่งรุ่นที่ผมซื้อมา มีตัวปรับความไวแล้ว |
 |
| การต่อใช้งานเบื้องต้น ไม่มีอะไรมาก เอาไฟจากบอร์ด จ่ายไฟเข้าตัว PIR (สายแดง+ และสายดำ-) ส่วนสายสัญญาณเส้นสีเหลืองในรูปต่อเข้าขั้ว2 ของ PWM บนบอร์ด และถ้าอยากรู้ว่าตัว PIR ทำงานได้ไหมเราต้องเพิ่ม LED เข้าไป (PIR ทำงาน ไฟที่ LED ติด) |

CODE ถ้าเราต่อสายเข้าขั้วตามที่แจ้งไว้เบื้องต้น ใช้ code ตามนี้ได้เลย (ไม่เกี่ยวกับลำโพงนะ มีแค่ โชว์แสงจาก LED)
/* PIR sensor tester*/
int ledPin = 13; // choose the pin for the LED ไฟโชว์สถานะการทำงานของ LED ต่อเข้าที่ขา 13 บนบอร์ด
int inputPin = 2; // choose the input pin (for PIR sensor) ขา 2 บนบอร์ด รับสัญญาณสถานะจากตัว PIR
int pirState = LOW; // we start, assuming no motion detected สถานะเริ่มต้นของ PIR คือ รอสัญญาณ
int val = 0; // variable for reading the pin status ค่าที่ส่งออกคือ 0 หรือ ไม่พบการตรวจจับใดๆ
void setup() {
pinMode(ledPin, OUTPUT); // declare LED as output
pinMode(inputPin, INPUT); // declare sensor as input
Serial.begin(9600);
}
void loop(){
val = digitalRead(inputPin); // read input value อ่านค่าจากสัญญาณเข้า
if (val == HIGH) { // check if the input is HIGH ถ้าสัญญาณให้ค่า High คือ พบการตรวจจับความเคลื่อนไหว
digitalWrite(ledPin, HIGH); // turn LED ON ส่งสัญญาณให้ขาที่ต่อกับ LED คือ สถานะคือ จ่ายไฟ ทำให้ไฟติด
if (pirState == LOW) {
// we have just turned on ถ้าไม่พบการตรวจจับ คือ ค่า Low
Serial.println("Motion detected!");
// We only want to print on the output change, not state
pirState = HIGH;
}
} else {
digitalWrite(ledPin, LOW); // turn LED OFF ไม่พบการตรวจจับใดๆ ให้จ่ายค่า Low คือ ไม่จ่ายไฟไปที่ LED ทำให้หลอดไฟดับ
if (pirState == HIGH){
// we have just turned of
Serial.println("Motion ended!");
// We only want to print on the output change, not state
pirState = LOW;
}
}
}
ผมพยายามแปลเป็นไทยๆ ให้ตัวเองอ่านแล้วเข้าใจการทำงานของการเขียนโปรแกรม ท่านใดแวะเข้ามาอ่านแล้วเห็นว่าผมแปลผิด รบกวนคอมเม้นท์ สิ่งที่ถูกต้องให้ผมด้วยคับ
Link แนะนำเรื่องการใช้ PIR กับ arduino
http://www.arduitronics.com/product/83/pir-motion-sensor-module
http://nuigarduino.wordpress.com/2012/03/29/arduino-ethernet-shield-motion-sensor-temperature-sensor-google-app-engine-data-logger/
http://learn.adafruit.com/arduino-lesson-17-email-sending-movement-detector/parts
http://sinocgtchen.blogspot.com/2011/11/email-alarm-arduino-ethernet-shield-pir.html
http://www.instructables.com/id/Arduino-Basics-PIR-Sensor/
http://www.albertopasca.it/whiletrue/2012/02/arduino-room-spy-email-notificator/
http://forum.arduino.cc/index.php?topic=161397.0
http://makezine.com/2012/11/01/build-a-basic-arduino-infrared-motion-alarm-with-weekend-projects/
http://makezine.com/projects/pir-sensor-arduino-alarm/


